How to Paint an RC Body Shell...with an Airbrush!
.png)
Rattle cans get the job done, but if you want total control over your paint job, mixing custom colours, and laying down crisp details, it's time to step up to an airbrush. It might seem a bit daunting at first, but once you get the hang of it, you'll never look at a plain clear Lexan shell the same way again.
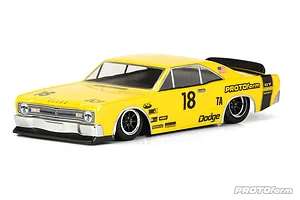
To show you the ropes, we're taking a Protoform Dodge Dart body, painting it up in a tough red and black colour scheme, and dropping it onto a Kyosho Fazer chassis. We'll cover everything from compressor settings to cleaning up, so you can tackle your first airbrush project with confidence.
What Gear Do You Need to Airbrush?
To start airbrushing RC bodies, you'll need an airbrush (either single or dual-action), a compressor, polycarbonate-safe paint, masking tape, and a cleaning pot. A well-ventilated workspace and a respirator mask are also essential for safety.
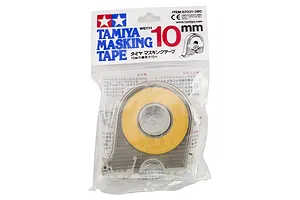
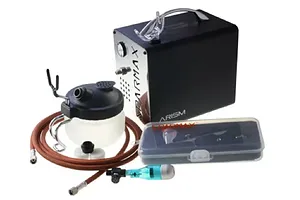
For this build, we're using the Sparmax Arism Compressor & Airbrush Kit. It's a brilliant starter setup that takes the guesswork out of matching hoses and fittings. We've also got a Sparmax Airbrush Spray Out Pot for cleaning, and a few rolls of Tamiya masking tape in various widths.
When you're setting up your workspace, keep your family and pets in mind. Overspray and fumes travel quickly, so an airbrush spray booth and proper ventilation are highly recommended. Always wear a suitable mask.
Choosing the Right Paint for Lexan
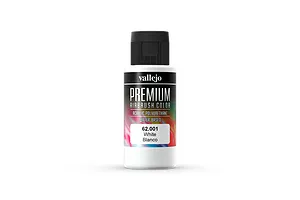
We're using Vallejo Premium Airbrush Colour for this project. Not all airbrush paints are created equal, especially when it comes to RC bodies. RC shells are made from polycarbonate (Lexan), which flexes and bends during a crash. Standard hobby paints will simply flake off the first time you tap a gutter or land upside down. Vallejo Premium paint is formulated with a highly resistant hybrid resin of acrylic-polyurethane. It bites into the polycarbonate and flexes with the shell, ensuring your paint job survives a day at the track.
The best part about using an airbrush is the ability to mix custom shades. We blended a few different Vallejo reds to create a unique, deep colour that you just can't get straight out of a spray can.
How Does a Dual-Action Airbrush Work?
Airbrushes work on a principle called atomisation. The liquid paint is broken down into fine droplets by pressurised air and propelled onto the surface.
Airbrushes can be single-action or dual-action. Single-action airbrushes release air and paint simultaneously when pressing the trigger.
The Sparmax airbrush in our kit is a dual-action model. This means the trigger controls both the airflow and the paint volume independently. You press down on the trigger to start the air flowing, and then pull back on the trigger to introduce the paint. The further back you pull, the more paint comes out. This gives you precise control over how heavy you're spraying, allowing for fine details or broad coverage.
Setting Your Compressor
For Vallejo Premium Airbrush Colour, you want to set your compressor to between 15 and 20 PSI. This can vary slightly depending on how much you thin the paint, but it's a solid starting point. Check the back of your paint bottle for recommended spray pressure of airbrush-ready paints.
Atmospheric conditions matter, too. Try to avoid painting when it's overly hot or humid. The sweet spot for laying down smooth coats is generally between 15°C and 30°C.
Airbrushing the Body Shell: Step-by-Step
Before you even look at your airbrush, you need to prep the unpainted body shell. Wash it thoroughly with warm, soapy water to remove any mold-release oils from the factory, let it dry completely, and apply your window masks.
1. Masking and Planning
We're going for a tough muscle car look: a red main body, black bonnet and boot, and silver bumpers. Masking is exactly the same as if you were using rattle cans. Lay down your tape firmly, making sure the edges are sealed tight so paint can't bleed underneath. Cover the rest of the body with paper or more masking tape to protect it from overspray.
2. Test Your Spray
Fire up the compressor and set the pressure. Before pointing the airbrush at your fresh body shell, give it a quick blast of just air to clear any moisture, then test your spray pattern on a piece of scrap cardboard or an old jar. This ensures your paint is flowing smoothly and prevents unexpected splatters.
3. Dark Colours and Details First
When painting RC bodies, the rule most of the time is to paint dark colours and outer details first, moving toward lighter colours last. We started with the black bonnet and boot.
Just like with rattle cans, your first coat should be a very light dust coat. Don't try to get full coverage straight away. This dust coat gives the subsequent layers something to grip onto, preventing runs and pooling. Once the black was opaque and dry, we moved on to the silver bumpers, and finally, the custom red main body.
4. The Twist: Painting on the Outside
Normally, you paint an RC body shell on the inside so the clear Lexan acts as a protective, glossy clear coat. But for this Dodge Dart, we decided to break the rules and paint on the outside.
Why? Because this isn't a shelf queen; it's a track car. By painting on the outside, the paint will naturally scratch and scuff when it rubs against barriers or other cars, revealing the clear Lexan underneath. It creates an authentic, weathered race car look that evolves the more you drive it.
If you decide to try this, remember two things: first, the paint will dry with a matte finish unless you apply a gloss clear coat over the top. Second, you must peel off the protective overspray film before you start painting. If you forget, you'll lay down a beautiful paint job only to peel it straight off into the bin.
Cleaning Your Airbrush
If you want to get better at airbrushing, you have to practise. And to practise, your gear needs to work. Cleaning your airbrush keeps it working. Cleaning is non-negotiable.
When you're finished painting, pour any excess paint out of the cup. Place the nozzle of your airbrush into the rubber housing of your cleaning pot. Add some airbrush cleaning fluid to the cup, and flush it through until it sprays completely clear. Keeping the internal needle and nozzle spotless is the secret to a long-lasting, reliable airbrush.
Ready to Start Spraying?
Airbrushing opens up a whole new side of the RC hobby. Whether you're painting a highly detailed crawler body or a high-visibility race shell, the control and finish you get from a proper compressor and airbrush setup are well worth the learning curve.
If you're looking for the right body shell to practice on, check out the massive range at Hobbies Direct. With over 78,000 products in stock and same-day dispatch, we've got everything you need to build your dream rig. You can even use our Part Finder tool to ensure the shell you pick perfectly fits your chassis.
Aaron
Content Creator & Marketing Coordinator · Hobbies Direct
Frequently Asked Questions
For polycarbonate RC paints like Vallejo Premium, a pressure between 15 and 20 PSI is ideal. You may need to adjust slightly depending on the viscosity of the paint and the temperature of your workspace.
Standard practice is to paint the inside of a clear polycarbonate RC body shell. This protects the paint from crashes and uses the clear plastic itself as a glossy top coat, though painting the outside is sometimes done for a weathered, matte look.
A dual-action airbrush allows you to control both airflow and paint volume with the same trigger. Pressing down releases the air, while pulling back controls how much paint is atomised into the airflow.
Empty any remaining paint from the cup and fill it with airbrush cleaning fluid. Spray the fluid through the airbrush into a cleaning pot until the spray runs completely clear, ensuring the nozzle and needle are free of residue.
No, standard acrylic paints will flake off a flexible RC body shell. You must use paints specifically formulated for polycarbonate or Lexan, which contain resins that bite into the plastic and flex upon impact.


To viewe this blog in its original YouTube video form, click here ! While you’re waiting for your cup-a-soup to be ready, and in less time than it takes to watch this video, you can likely give you...
.png)
