


How to Replace an RC Steering Servo: A Complete Guide

The steering servo in your RC car is the electric muscle that points your wheels where you want them to go. Just like you need a proper gear mesh and throttle calibration to go fast in a straight line, your steering system needs to be perfectly dialled to carve up the corners. Whether you're upgrading for more torque or replacing a stripped gear, swapping a servo is a rite of passage for every hobbyist.
What Does a Servo Do in an RC Car?
A servo is essentially a small motor paired with a gearbox and control electronics. In electric cars, its primary job is steering. In nitro or large-scale petrol models, servos also control the throttle and brake linkages. You'll even find them shifting gears in crawlers.
Most modern hobby-grade servos use a standard mounting layout. They are anchored to the chassis with four screws and feature a splined output shaft. An arm or "horn" sits on this shaft, connecting the servo's rotational movement to your steering linkages.
Signs It's Time to Replace Your Servo
- Grinding noises: If your steering sounds like a pepper grinder, you've likely stripped the internal plastic gears.
- Slow or weak response: The wheels struggle to turn when the car is stationary on the ground.
- Dead motor: You have power to the receiver, but the servo doesn't move or make a sound.
- Upgrading: You want a faster response time for racing or more torque for turning heavy crawler tyres.
Tools You'll Need
Replacing a servo is a straightforward job. You'll need:
- A quality set of hex drivers (we highly recommend the MIP Hex Driver Set to prevent stripping screw heads).
- Small pliers or a nut driver for removing steering linkages.
- Zip ties to tidy up the wiring once finished.
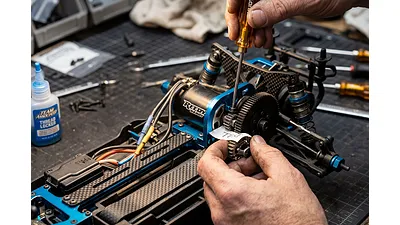
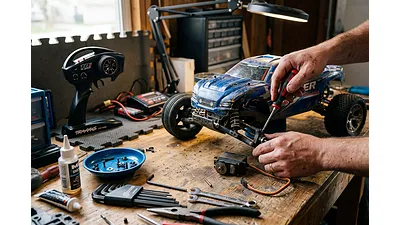
Step-by-Step: How to Replace an RC Servo
Step 1: Remove the Old Servo
Start by unscrewing the single screw holding the servo horn to the output shaft. Pull the horn off and leave it attached to the steering linkages. Next, trace the servo wire back to your receiver box. Open the box, unplug the servo from Channel 1 (CH1), and free the wire from any clips or zip ties. Finally, remove the four mounting screws holding the servo to the chassis and lift it out.
Step 2: Mount the New Servo
Drop your new servo into the mount and secure it with the four mounting screws. Don't overtighten them, especially if you're screwing into plastic. Route the new wire neatly along the chassis and plug it into Channel 1 on your receiver. Make sure the polarity is correct — the darkest wire (usually black or brown) goes toward the outside edge of the receiver.
Step 3: The Golden Rule — Centering Your Servo
Do not attach the servo horn yet. This is the most crucial step. Turn on your transmitter and make sure the steering trim dial is set to neutral (zero). Now, plug in a battery and turn on the car.
The servo will instantly snap to its true centre position. Leave the car and radio turned on for the next step.
Steering Trim Note: If you are using a basic RTR controller like the FlySky GT-2, the steering trim is usually the dial on the top left. The notch should point straight up or to the 9 o'clock position, depending on the specific model.
Step 4: Attach the Servo Horn
With the servo powered on and centred, manually straighten your car's front wheels. Carefully slide the servo horn onto the splined output shaft so it aligns as closely to centre as possible. Insert and tighten the horn screw.
Now, use the steering trim dial on your transmitter to make the final micro-adjustments until the wheels are perfectly straight.
Why Centering Your Servo is Essential
If you bolt the servo horn on without letting the servo find its centre first, the car will likely pull hard to one side the moment you turn it on.
At best, this means you have to take the horn off and do it again. At worst, the servo will try to pull the steering past its physical limits. When a powerful metal-gear servo like the Savox SC-1256TG Plus fights against a plastic steering stop, something has to give. You risk stripping the servo gears, snapping a steering link, or burning out the servo motor entirely. Centering takes ten seconds and saves you buying a replacement.
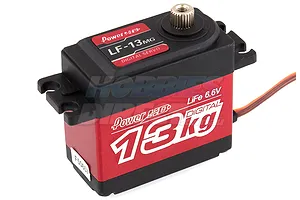
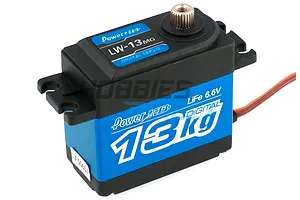
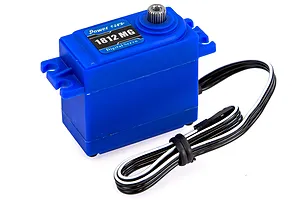
Popular Servo Brands for Upgrades
If you are replacing a broken stock unit, stepping up to a reputable aftermarket brand is a smart move.
Brand | Best For | Typical Features |
|---|---|---|
Bashers, racers, and crawlers | Titanium/steel gears, high torque, coreless motors | |
Budget-conscious upgrades | Waterproofing, full metal gears, excellent value | |
Direct replacements for Traxxas models | Guaranteed fitment, waterproof, plug-and-play |
Aaron
Content Creator & Marketing Coordinator · Hobbies Direct
Keep stripping your spur gear? In this article, we'll show you exactly how to prevent this by correctly adjusting your gear mesh on your RC car.

Strengthen up your HSP 2WD off-road RC car with this cool mod that fixes weak point in these models.
Maybe you’ve upgraded to a new radio, maybe you plugged something in where you weren’t supposed to, or maybe your car likes to pretend it’s a submarine and spend more time underwater than it does o...
Being a good RC driver doesn’t involve any special tricks, just reaction time and some finesse on the controls. Proper throttle use can be the difference between a particularly sweet drift and a pa...
RC car steering not working? Here's how to troubleshoot!
How to use the basic but brilliant B3.
