Next Dispatch: 02d 20h07m47s
How to: Make an RC Car Faster

How to: Make an RC Car Faster

So, you’ve just got your first proper RC car and you are absolutely loving it. You’ve been running it every day – sometimes twice – and you’ve definitely got some driving skills now. But you start to feel something growling deep in your belly, that constant hunger for POWER! And today, we’re going to show you how to feed that hunger and make your RC car FASTER!!
 
To see this blog in its original Youtube Video form, click here!
 
Almost any brushed RC car can be converted to brushless, but today, we will be using this brushed HSP Viper. The Viper is part of a group of cars we refer collectively to as the “HSP 2wd cars”. We’ve covered why we like them so much in other videos and blogs, but basically, these are around $200, and come with remote, battery, charger, and brushed motor and electronic speed control. This is kinda old school tech, but it is very easy to use. It’s fast enough to be fun, but not too fast for new or inexperienced drivers. 
 

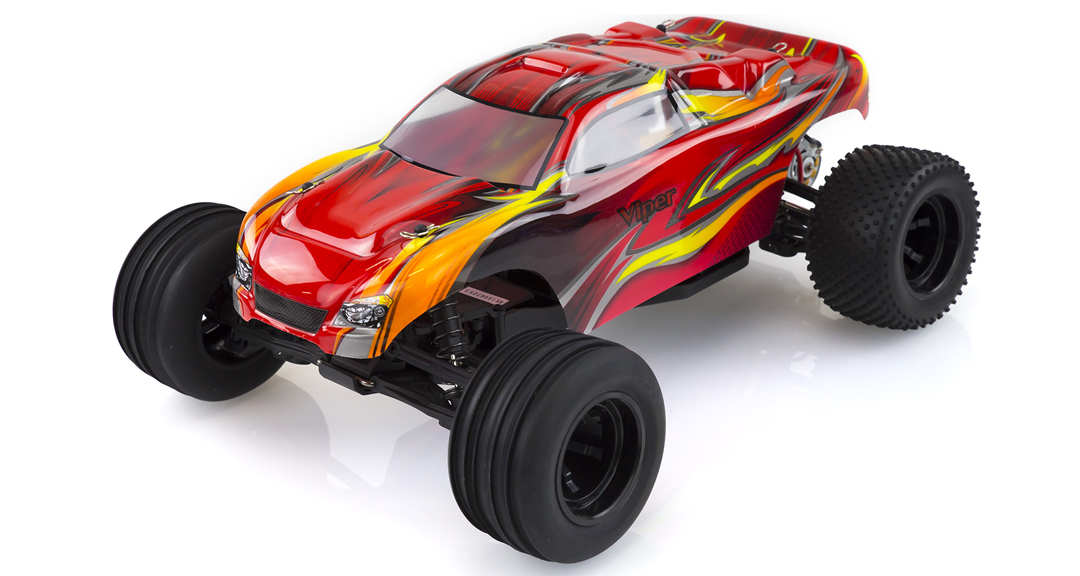
But that’s not you anymore – you’ve got to know your car, and now you want to unleash its full potential. Out of the box, the HSP Viper does 36km/h. Not bad, but we have the need for speed.

So! How are we going to make it faster?
 
First, let’s see what we’re working with here.
 
If you want to check what type of motor your car has before doing anything, an easy way to tell is to look at the number of motor wires you have:
• Brushed motors have two wires
• Brushless have three wires
 
This Viper has a brushed motor and a 6-cell nickel-metal hydride battery. So, what are we going to replace it with to get more fast?
 
Well, we could get a couple of km/h by playing around with the battery voltage. Either LiPo power or a 7-cell nimh battery. This would certainly wake the car up a bit in terms of acceleration, but with that stock brushed motor and ESC, won’t really change our top speed and will shorten the life span of these electronic components. 
We could also go a couple of kays faster by changing the gearing. A bigger pinion (or smaller spur) will give us slightly more top speed at the expense of acceleration. The car will go faster, but it’s not actually any more powerful, so it’ll take longer to get to top speed. Dull. 

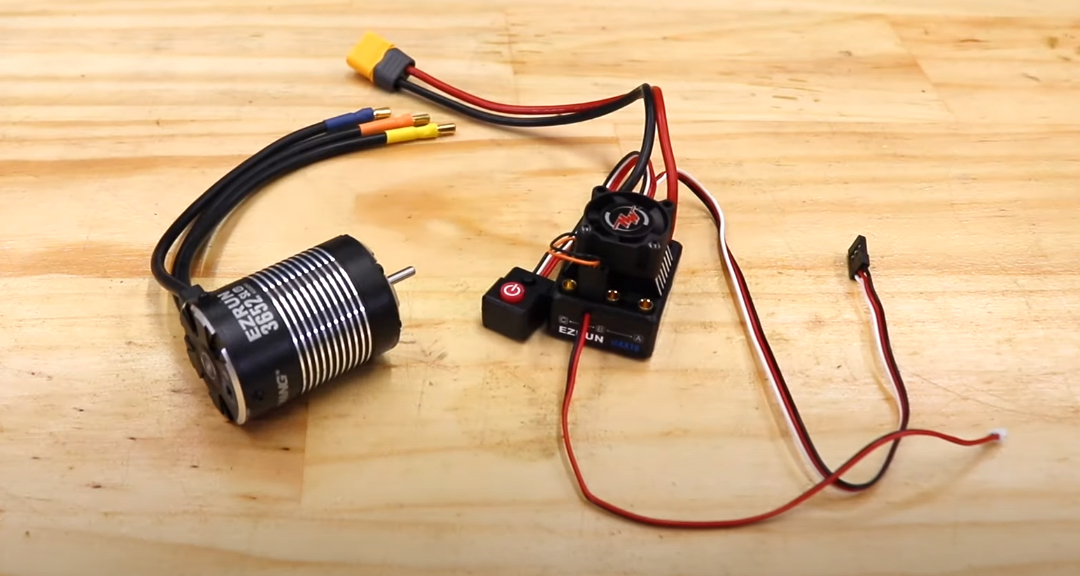
We want a reliable, immediate and massive power increase to fuel our hunger for speed!  So, in this build we will be upgrading to a LiPo battery and a new motor and ESC. I’m talking BRUSHLESS.
In this case, we are installing a Hobbywing Max10 60a 4000kv brushless combo. There are more expensive and more budget-friendly combos out there, but Hobbywing is renowned for their performance and quality, plus we’ve always had good experiences with Hobbywing electronics.
 

Why this one? What do all the numbers and specs mean? Check out our Glossary of RC Terms

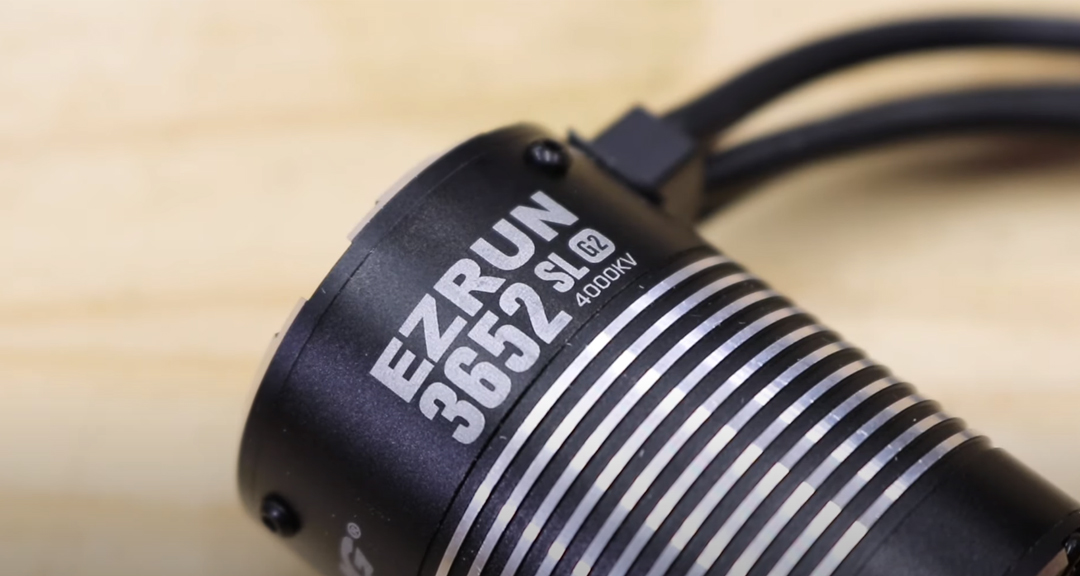
3652SL: This is the motor can dimensions. This means the motor is 36mm in diameter and 52mm long the "SL" stands for SensorLess.

4000kv: kv is the constant velocity of a motor, not to be confused with kilovolt – that’s not a thing. 
 
This value is the number of revolutions per minute (rpm) that a motor turns when one volt is applied with no load attached to that motor. So a 4000kv motor with 1v input = 4000rpm and 8000rpm with a 2v input, and so on.
The higher the kv rating the faster the motor, 5000kv is faster than 4000kv. However, lower kv motors have a higher torque output. 4000kv has more torque than the same sized 5000kv motor. Go too high on this value and the motor won’t have the torque to move the car unless it has very, very slow gearing, which kinda defeats our entire purpose here. 
When selecting a motor, keep in mind the size & weight of your vehicle. Also, if it is 2wd or 4wd is an important factor, as is takes more torque to power four wheels. If you’re struggling to work out what size or Kv motor to get for your RC car, check to see if the manufacture has the same model in a brushless already, as you can use the motor they install as a baseline. For example, the viper we’re upgrading today also comes in a brushless version called the Viper BL. This truck has a 3652SL 3300kv motor and a 60A ESC. So this tells me that the Hobbywing combo we’re installing will be faster but have less torque.  
It’s also worth mentioning that not all motor shafts are the same. There are two common sizes: 3.17mm (which is 1/8” of an inch) and 5mm. Check which one you need before selecting a combo as you need to make sure your pinion gear will fit onto your new motor.
 

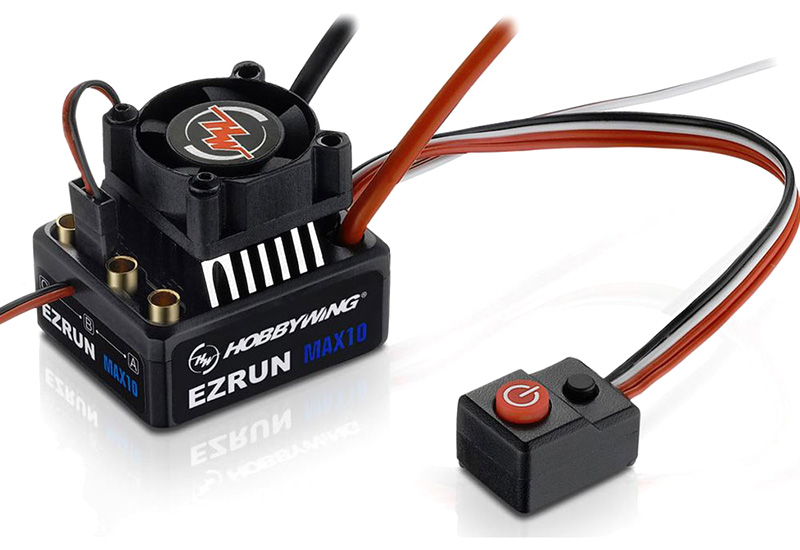
How many amps your ESC needs to be can vary quite a bit, but more is nearly always better. The amp rating (in this case 60) generally represent the sustained current the ESC can handle. Faster motors draw more power, especially at initial launch acceleration, so this 60A ESC with a burst current of 360A will do nicely.

Getting a combo is great as the motor is generally already matched to the ESC.
This combo is going to be significantly more powerful than the original stuff, so your nimh battery might struggle to give you decent run times, and it’ll likely get really hot.
 

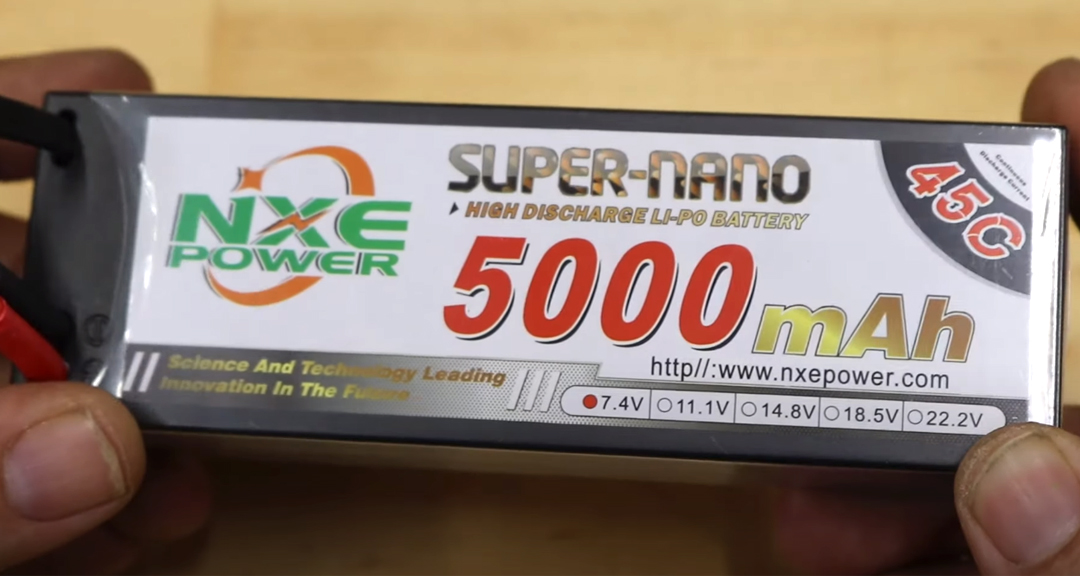
What do all these things on the battery mean? Well quickly:

The Mah is runtime; think of it as litres of fuel in the tank.
Voltage is how much power and top speed. Too much voltage and you’ll let the magic smoke out of your electronics......And I still haven’t worked out how to put the smoke back in.
The “C” rating is more complex, but aids in throttle response. This rating determines how much current can be drawn from the battery continuously without it sustaining damage. You can think of it as like a fuel pump and how much it can supply your engine, higher the C rating the more fuel it can supply to your big thirsty motor! So go as high as budget allows for this one. It worth mentioning that if you get a LiPo battery with a low C rating, you can damage both your battery and ESC.
 
We’re going to be dropping in this NXE 5000mah 2s lipo to maximise power and run times, so make sure your chosen ESC’s Low Voltage protection is switched on. LVC protects your lipos from damage caused by running LiPo battery flat, so check your instructions and make sure the LVC is definitely switched on. If, like us, you’re stepping up to lipo power as well, make sure you only ever us a lipo-compatible charger for your new power source. You can NOT use a NiMh charger for LiPos and trying to do so can be very dangerous.
 
For more in-depth explanations of these components, check out our Hobby Electronics Explained video – link in the description.
 
So, with that nerd stuff out of the way, lets go fast. Here’s what you’ll need:
• Your selected Brushless Motor & ESC.
• A suitable LiPo Battery & charger – Very important note; you can NOT charge LiPo batteries on the same NiMh or NiCd chargers.
• Tools to remove your motor and pinion gear - in our case, a 1.5mm & 2.5mm hex.
• Microfiber cloth and methylated spirits to clean the surfaces before sticking the new ESC down.
• Zip ties to tidy up our wiring.
If you want to check what type of motor your car has before doing anything, an easy way to tell is to look at the number of motor wires you have:
• Brushed motors have two wires
• Brushless have three wires
Now, converting a brushed motor & ESC to brushless on a rear-motor 2wd chassis like this is super easy, barely an inconvenience. Firstly, take a photo of how everything was connected, you may need to reference something when you go installing new stuff. 
Now you can unplug everything – the esc from the receiver (it’s in channel 2), and the motor from the esc.
You now should be able to remove the ESC from the car. This one is just held down with double sided tape. Now it’s time to swap the motor.
 
On the viper, it’s just a case of removing the gear cover – 2 screws…
 

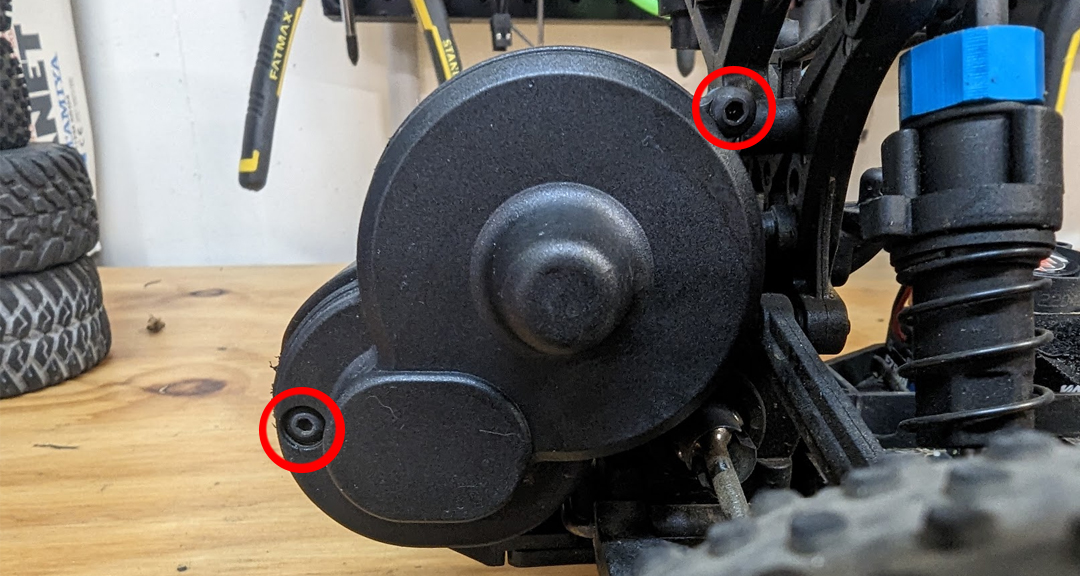
And unbolting the motor…2 screws.

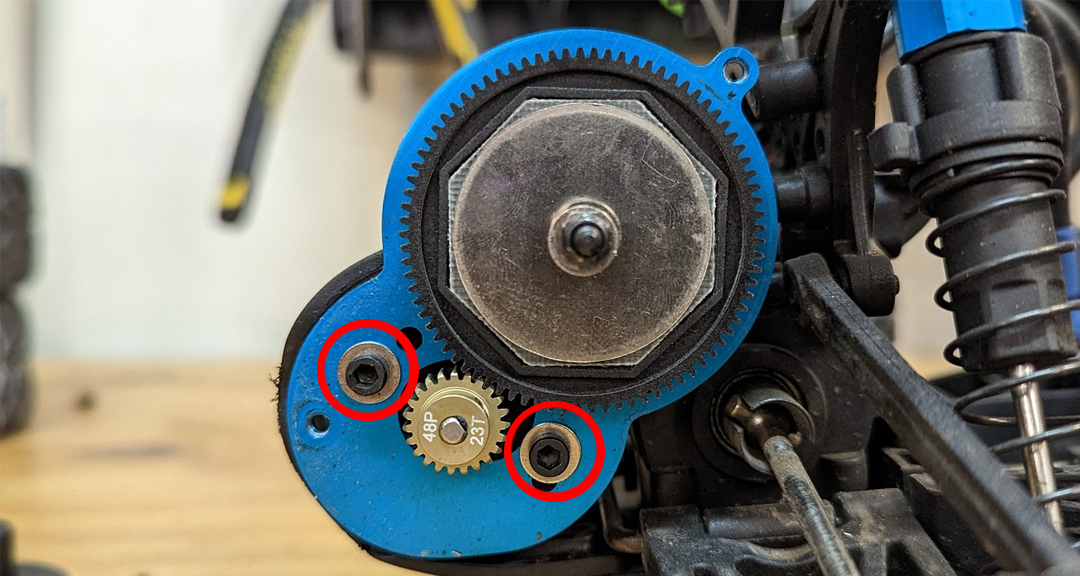
You may have to take off the pinion gear to get the motor off the mount, but that’s okay, we need to transplant it onto the new brushless motor anyway.

If your car has fixed gear mesh, go ahead and bolt the new motor in. If not, check your mesh as you tighten down the motor screws. Check the alignment with the spur too, and adjust if necessary.
Setting the gear mesh right is an important step to ensure you don’t strip your gears, if you need more help see our video on setting your gear mesh here, or read the associated blog.
You can now attach your new ESC - usually with double sided tape – to wherever fits best on the chassis. Be sure to clean both surfaces thoroughly to make sure they adhere properly, you don’t want dust, dirt and debris when applying the double sided tape.
 
Plug in your motor wires, you will notice there are three - normally labelled A, B, C if they are labelled.
 
Plug the ESC into the receiver. It goes into channel 2, usually with the wires going (left to right) signal, positive, negative. Your receiver should have little symbols telling you what way around to plug it in, but if it doesn’t, you can consult that photo you definitely took earlier.
 

Double check all your connections, settings, and screws. 

Now we need to calibrate the ESC and transmitter, this will set the full throttle, neutral, brake & reverse positions to your specific transmitter. Also, make sure your throttle trim is at neutral before starting the calibration process. Read your ESC manual for instructions, we’ve done a video on how to calibrate ESC end points as well. You can watch it here, or read the blog here.
 
Give the car a gentle test drive just to make sure all is well. You may have to flip the channel 2 reverse switch on your radio if the car doesn’t move forward (or goes backwards) when you pull the trigger. If it’s faster in reverse than forwards, switch any two of the motor wires around, and try again. On some cars, you may have to both swap 2 wires, and reverse the channel switch. 
 
One last thing to check before our first run: if your radio has a built-in fail safe, ensure it’s set to the correct throttle position. Failing to do so can result in a runaway!
So, put your car up on a box or something to get the wheels off the ground, otherwise your runaway test may become a runaway for real.
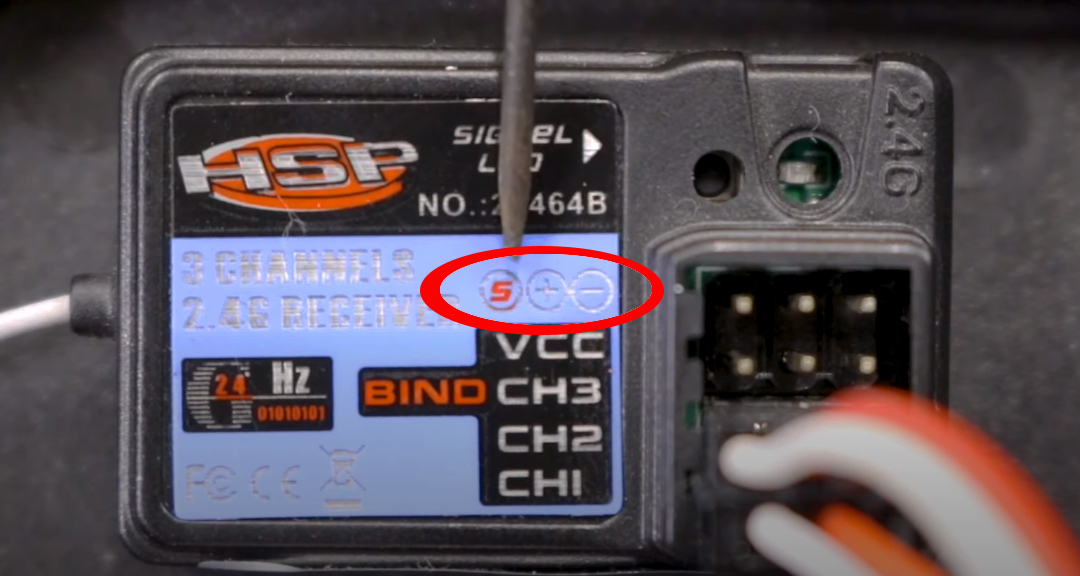
 Usually, the remote should be the first thing turned on, then the car. When turning off, it’s switch the car off first, then the remote. 
But, we’re testing the fail safe here, by simulating signal loss. We do this by turning off the remote before turning the car off. 
 
Watch our video on how to set a failsafe here, or read the related blog here.
 
Now it’s time to see just how must faster your pride and joy is now! 
 
Our viper went from 36kmh out the box to a new top speed of 63km/h! Massive gainzzzzzzzz. And yeah, likely more breakages and worn out parts. But totally worth it, it just gives us an excuse to tinker with it for more speed!
 
That’s it – how to make your RC car faster – properly faster.


Related Posts
How To: Set a Gear Mesh on an RC Vehicle
How to: Calibrate an ESC
How to: Set a Fail Safe
Bringing the RC Hobby Indoors
Alternatives
Error

Something went wrong please try again later.