HSP 2WD Steering Post Upgrade/Mod
HSP make some awesome cars and their newest 2WD 1/10th range which includes the Mongoose, Viper, Crusher and Storm is no exception. Typically, the most common/first parts to break on any RC are things like steering hubs, suspension arms, front shock towers and front drivetrain (if there is any), though one thing we've noticed with these new releases which are all running the same overall-all design (and chassis/arms if you exclude the storm) is that they aren't breaking many of those common parts that you'd expect, in fact... they're rarely breaking anything at all! HSP have actually used a different plastic compared to their previous models (and it seems, to the competition such as HPI, Traxxas and Losi). The new plastic they've incorporated has a lot more flex, but still maintains a good amount of rigidity and more importantly, is super tough.
We've noticed that under high impact, such knocking into poles, gutters or even doing some extreme tumbles, the steering assembly is able to pop out since it is held in only by the clamping force of the upper chassis plate and main lower chassis, and with the amount of flex in the plastics HSP have used, there can be enough movement that the pins can unseat and go flying out into the great unknown.
Today we'll show you a great mod you can do to your 2WD HSP car to reinforce this area, and greatly reduce the chance of having these posts come out after a big crash, and improve the reliability of what is already an awesome chassis.
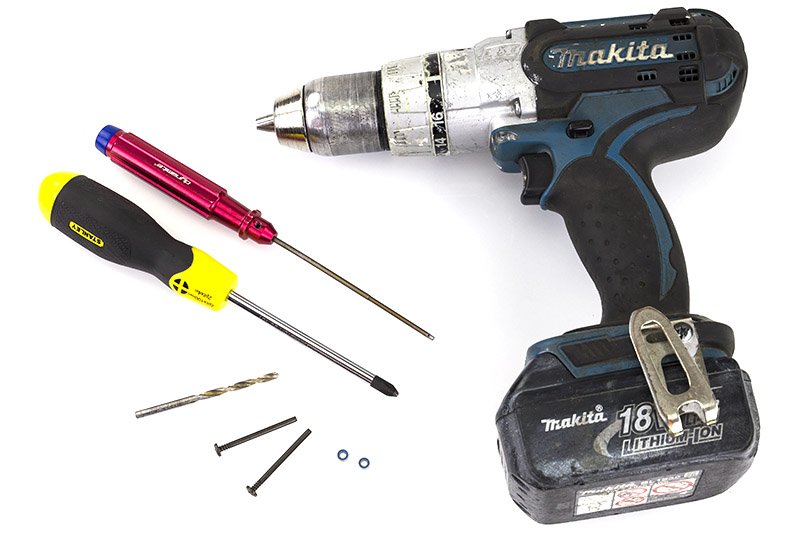
What You'll NeedDrill
Pliers
3mm Drill Bit
Phillips Head Screwdriver
2mm Hex Driver (or Allen Key)
Hobbies Direct's Steering Post Upgrade Kit
Alternatively, you can purchase the individual bits from the kit below
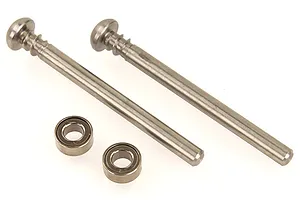
3x36mm Screw Pins x2 (We cut 4mm off some HPI Z599 3x40mm Screw Pins)
3x6x2.5mm Bearings x2 (Only required if you've lost your existing bearings/bushes from the steering assembly)
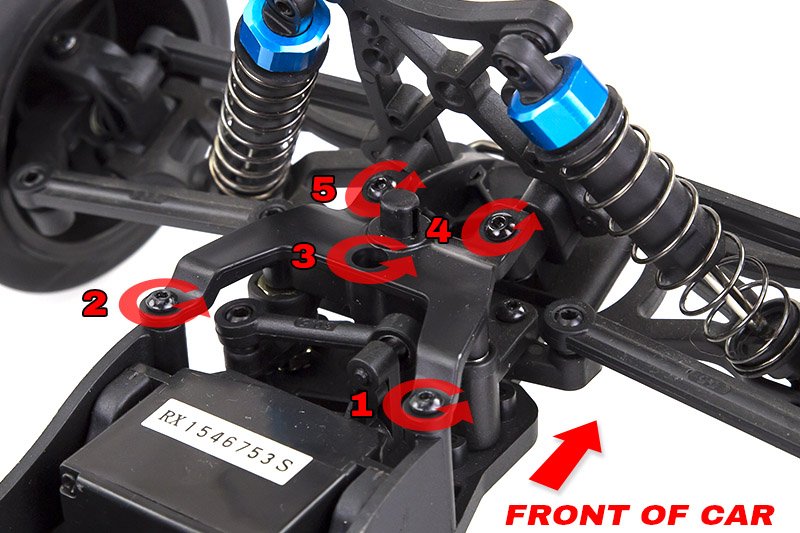
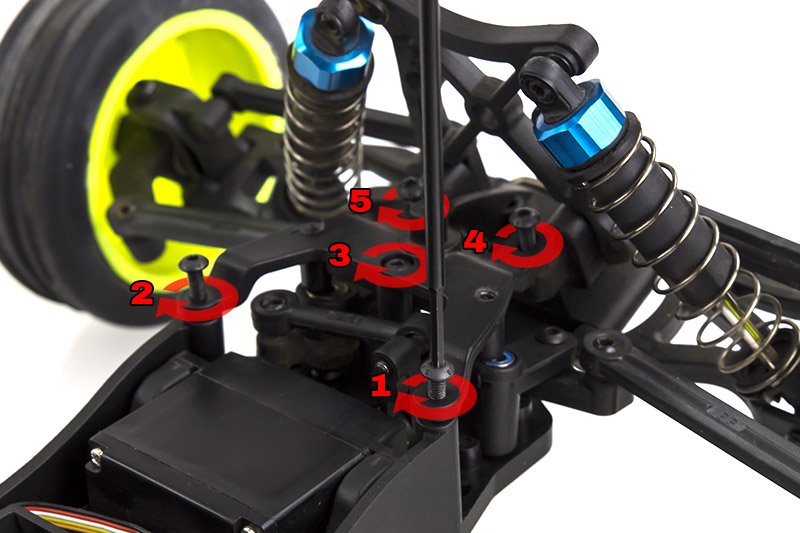
 Step 1 - Remove the upper bulkhead brace
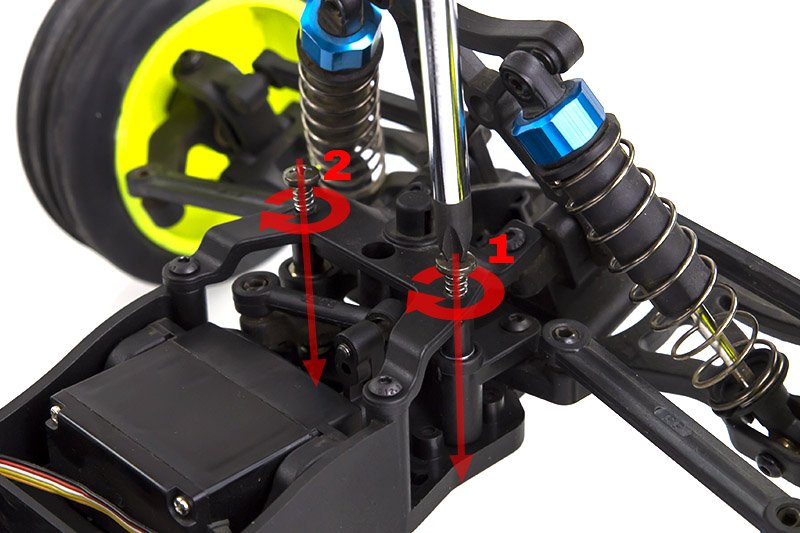
Using a 2mm hex driver, completely unscrew and remove all 5 screws holding the upper bulkhead in. Note: The centre screw (numbered 3 in this picture) is slightly longer than the other 4.
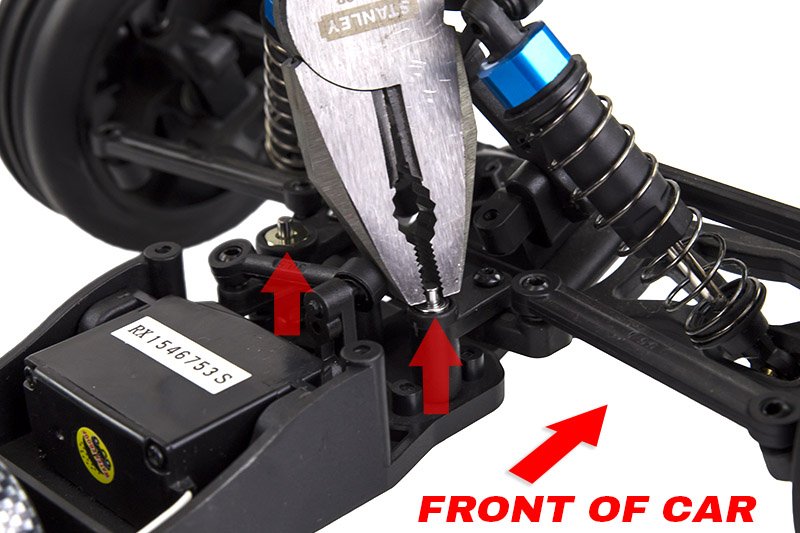
 Step 2 - Remove pins and bearings
Using a pair of pliers (or fingers if you're superman) gently remove the steering pins from both sides of the assembly and both the bearings on the RH steering post.
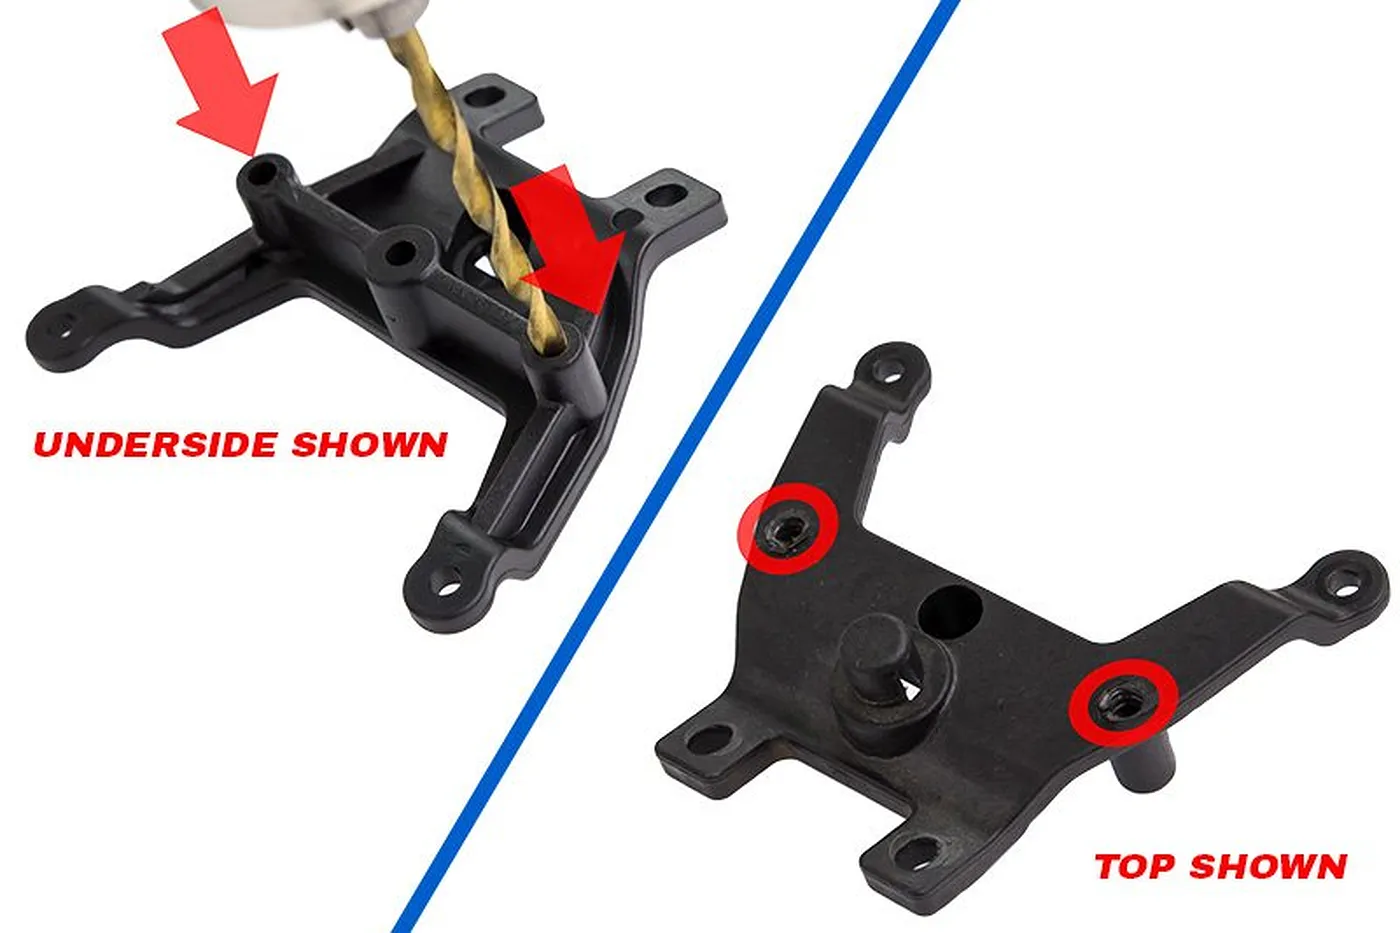
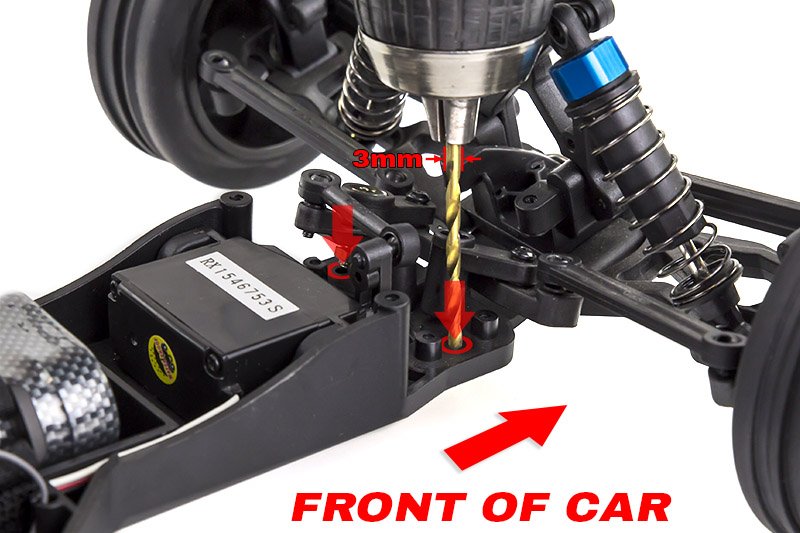
 Step 3 - Drill out the chassis
Push the now loose steering assembly aside, and using a 3mm drill bit, carefully drill through the socket where the steering post pin normally seats.
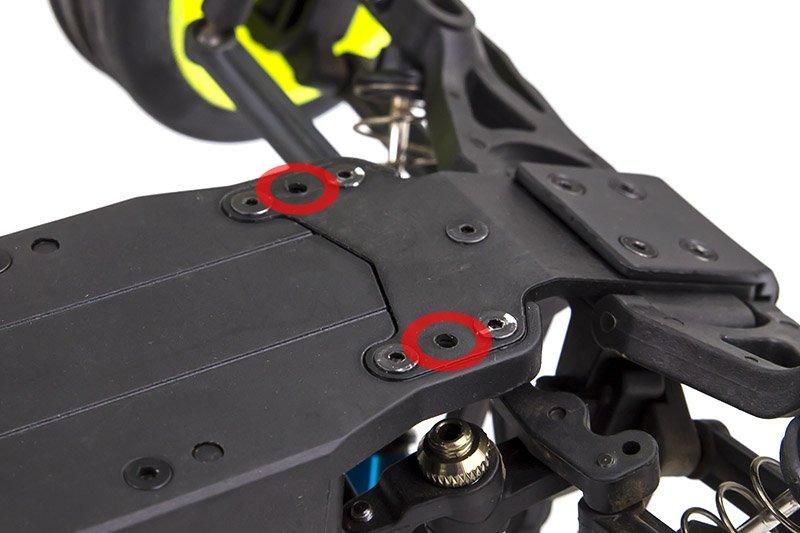
 Step 3 - Underside Shown
As shown, the holes drilled go right through the bottom of the chassis
 Step 4 - Drill upper bulkhead brace
Carefully drill out the two steering pin mounts in the upper bulkhead brace. As shown, the holes drilled go right through to the other side of the bulkhead.
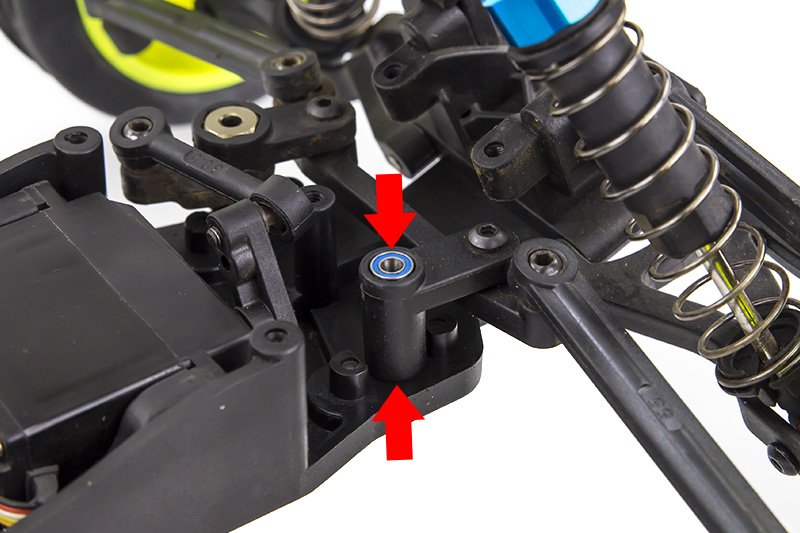
 Step 5 - Refit the steering post bearings
Re-insert the steering post bearings. Make sure the bottom one doesn't drop out before the steering post pin holds it firmly in place
 Step 6 - Refit the upper bulkhead brace
Line up the upper bulkhead brace and screw in the 5 original screws. Remember to put the longer screw in the centre (shown as 3 in this image)
 Step 7 - Screw in the new pins
Using the upgrades screw pins, insert and screw them into the two newly drilled holes in the upper bulkhead brace. Make sure the pins go through the steering posts smoothly and line up with the holes drilled in the chassis. If they don't line up with the pre-drilled holes, the pin will push the whole assembly up and away from the chassis and potentially strip or break something. Do keep in mind, that the first time you screw the pins in, they will require a bit of pressure to get the threads to tap in the first time.
 Step 8 - Complete!
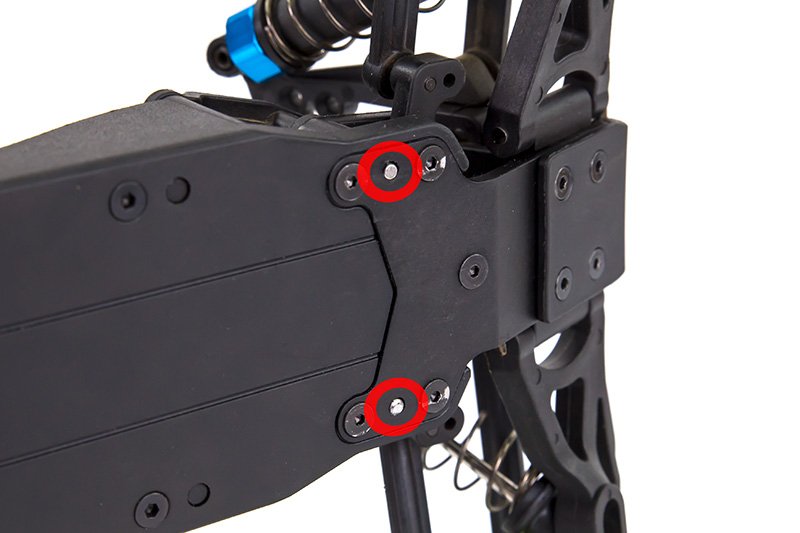
You're all done! Your pins should be sitting flush with the bottom of the chassis as shown. If they are sticking through too far, you can consider shortening them to the required length by marking them with a texta and removing them and using a hacksaw to cut them down.
William
IT & Networking · Hobbies Direct
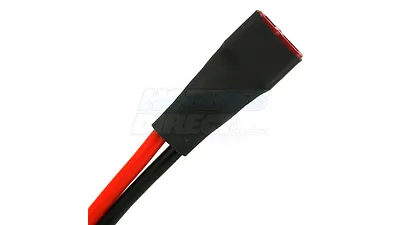
Never break the wires off your Deans Ultra T plug again using this great and easy to do tip. All you need is: A Hot glue gun, heat gun, some shrink wrap and of course the a deans ultra plug pre-sol...
Maybe you’ve upgraded to a new radio, maybe you plugged something in where you weren’t supposed to, or maybe your car likes to pretend it’s a submarine and spend more time underwater than it does o...
The steering servo in your RC car is the electric motor that moves the steering side to side. In the same way that you need good gear mesh and throttle calibration to go fast in a straight line, yo...

To viewe this blog in its original YouTube video form, click here ! While you’re waiting for your cup-a-soup to be ready, and in less time than it takes to watch this video, you can likely give you...
