Baja 5B Quick Start Guide
You’ve just got your hands on a 5B Baja and need to know how to get it up and running? Read on! Or, to watch this blog in its original YouTube video form, click here!
Start by unpacking the contents from the box - lay everything out on a clean workbench to make sure you don’t lose anything.
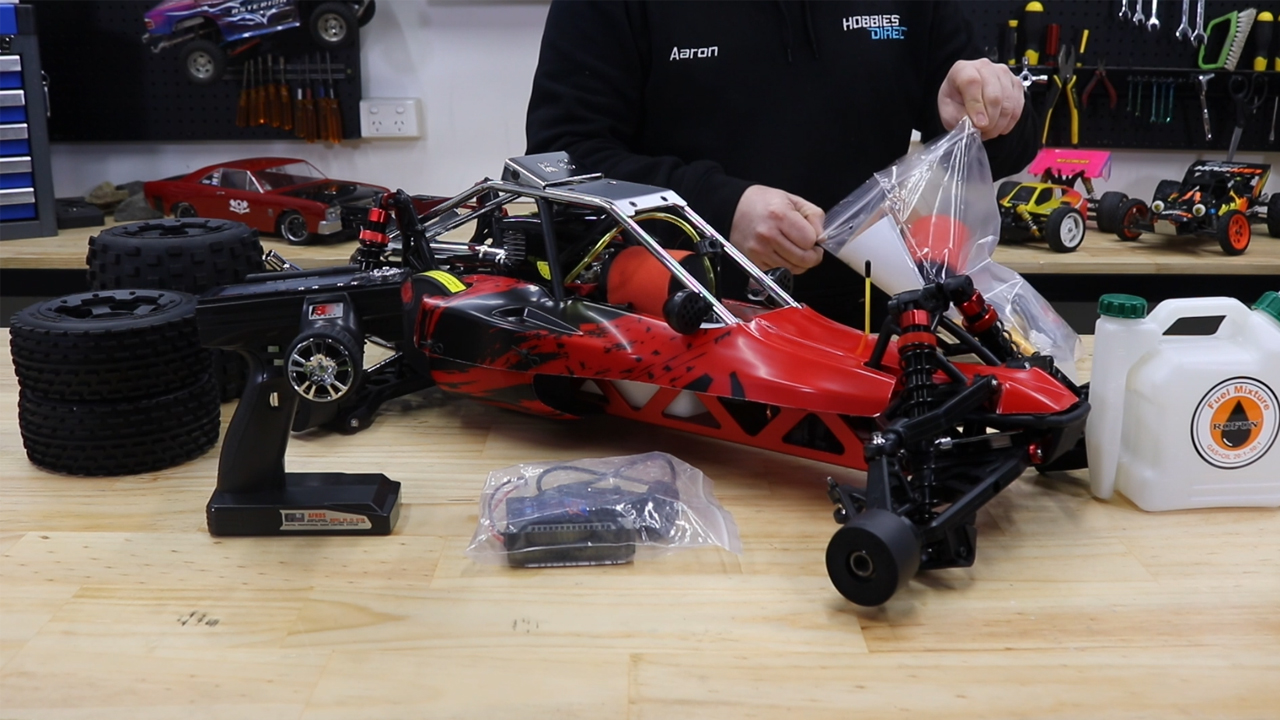
You will have:
The buggy, 4 wheels, rear wing, transmitter, battery charger, user manual, fuel mixing bottle, and a bag with spares and some basic tools.
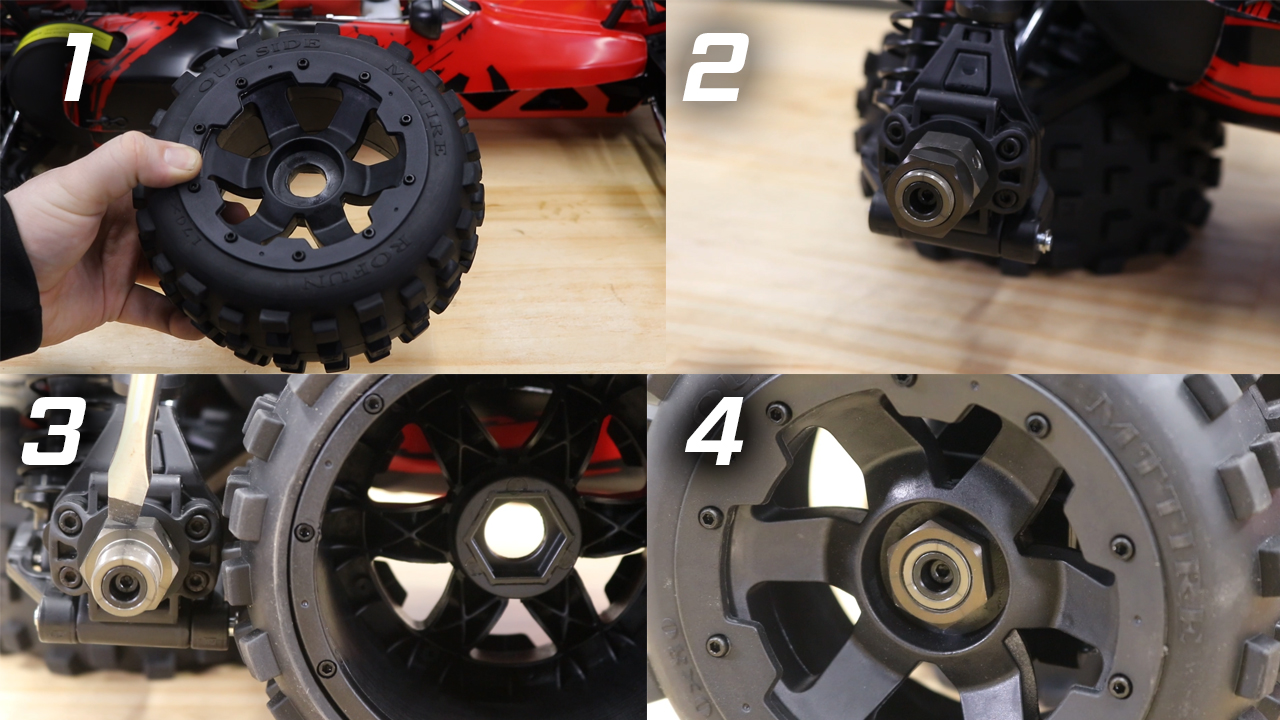
These buggies come with the wheels removed for shipping, you will need to install the wheels before use. Remove the wheel nuts from the axle and line up the wheel hex with the axles hex and slide the wheel on. You will notice the wheel nuts have a serrated side, this side goes on facing the wheel to bite into the rim, to help lock them in place and stop them from coming undone by themselves.
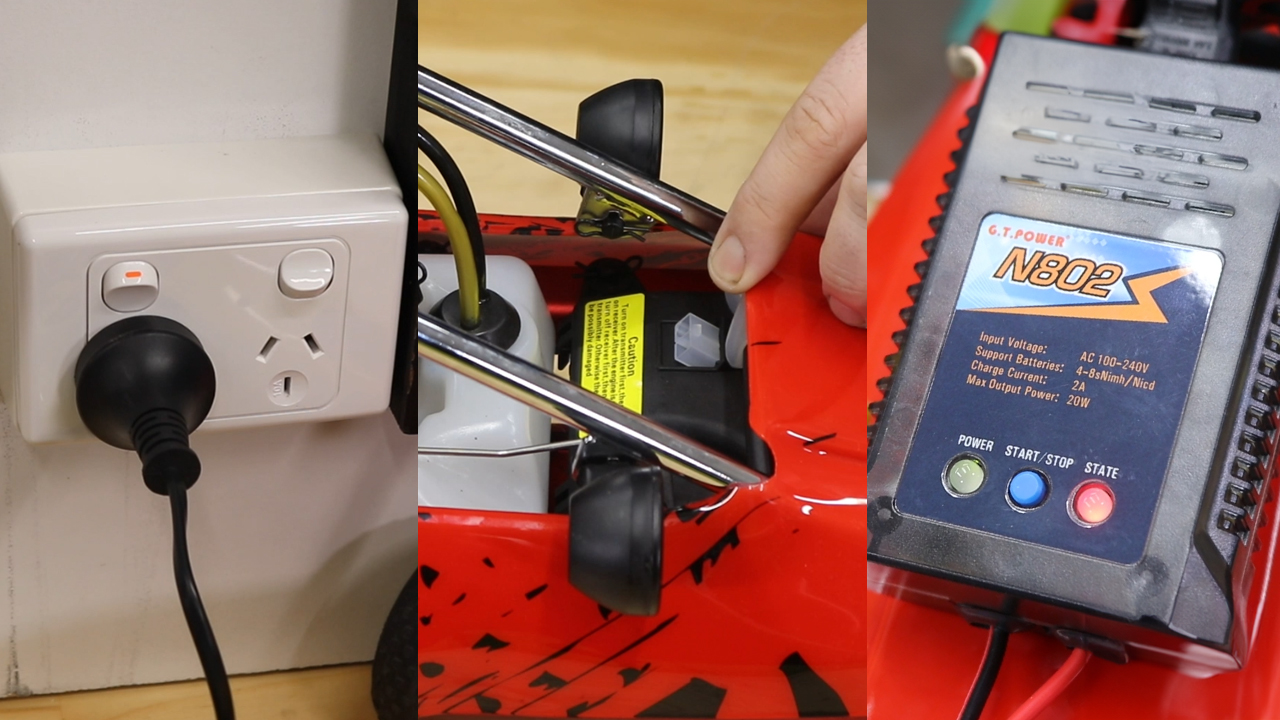
Plug in the wall charger and connect it into the charging port on the radio box located at the front of the buggy. Once connected, press the blue start button. When fully charged the status LED will go green.
While you’re waiting for the battery to charge, you can install the rear wing. Put the wing in place, then push the posts down through the holes. Then, push the clips in to secure the wing in place. You can put the stickers on now if you like.
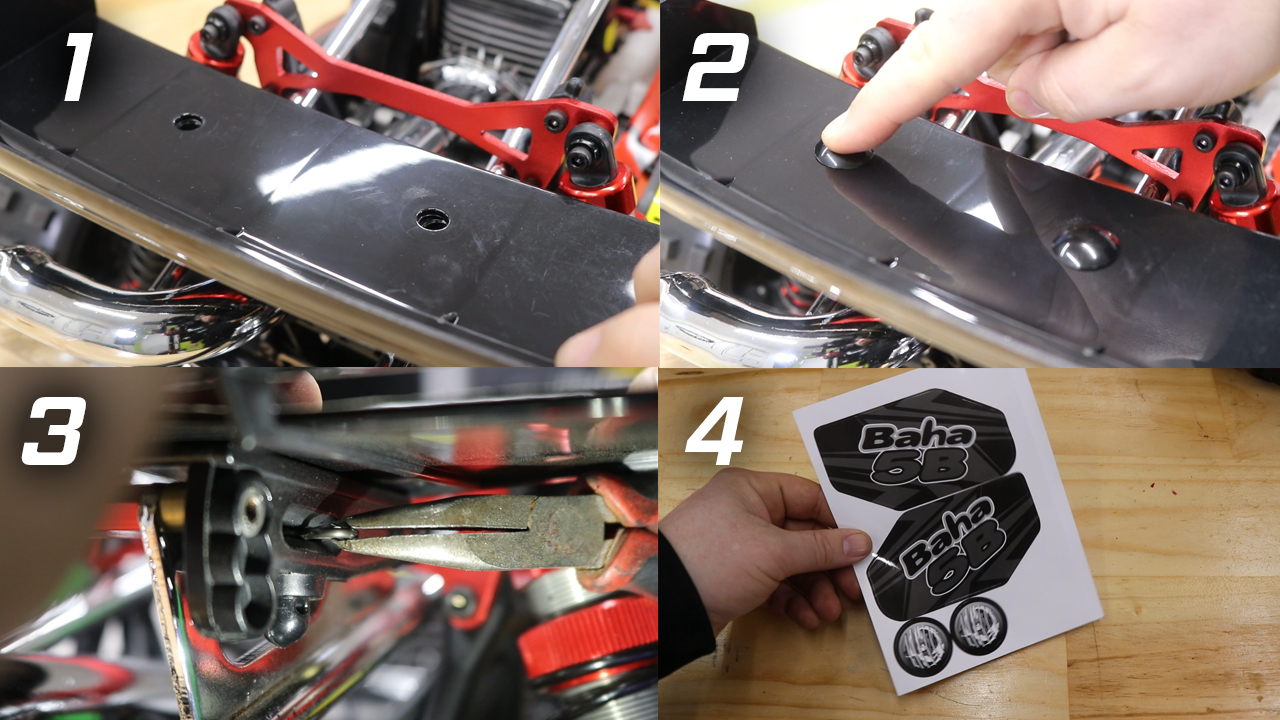
There’s more stuff in this bag too. There is little spacers are for tuning the front camber arms, and some toe shims of increasing amounts for the rear hubs. More rear toe in sacrifices some top speed, but makes up for it with more stability.
You can also peel off the protective film from the body panels. This part is particularly satisfying.
Install the 8 AA batteries into the controller – or however many batteries your controller needs.
Check to make sure the air filter is oiled from the factory, do this by sliding the outer foam back and inspect the inner foam filter.
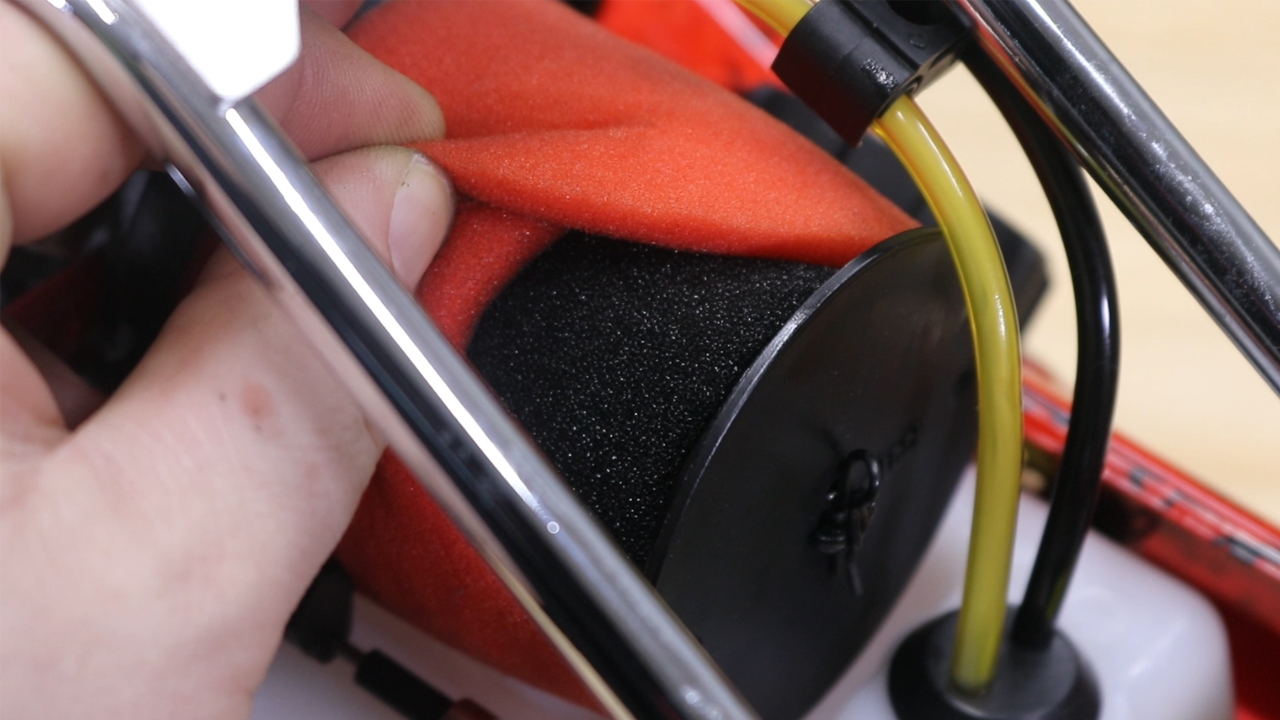
If the inner foam air filter needs to be oiled, do so before use. You can use either the included Rovan foam air filter oil or another high-quality spray oil, like Penrite or Castrol. We’ve done another video on how to do this step by step, see the link in the description on YouTube.
Mix up a fresh batch of 25/1 two stroke fuel using a high performance two stroke oil like this Castrol TTS fully synthetic 2 stroke oil. Using inferior oil, or mixing the ratio incorrectly could result in damaging the engine. Measure out 1 litre of 91 – 98 octane unleaded petrol and add 40ml of oil, or 200mls in a 5L jerry can. Mix thoroughly before filling the tank. Only use approved fuel containers and follow the safety instructions. We’ve done another video on how to mix two stroke step by step, see that link in the description of the YouTube video as well.
Before starting the engine, we need to do some pre run checks to ensure everything is working properly.
Start by turning on the transmitter, then turn on the car. Always have the transmitter, the hand held remote controller, be the first thing on and the last thing off. Just like every RC, the vehicle should never be switched on unless the transmitter is first.
It’s time to test the electronics and make sure everything is working properly.
Turn the steering wheel anti clockwise to turn left and clock-wise to turn right.
Quick note: you can adjust the steering trim to make fine wheel alignment adjustments if you notice the car pulling to one side when driving in a straight line.
Pull the trigger to accelerate, you will notice the throttle linkages pushing the carby open. Check that when the trigger is in the neutral position the carby shaft is resting on the idle screw.
Push the trigger away to apply the brake.
To test the brake, roll the buggy along the ground and apply the brake to ensure it’s working properly.
Next, test the failsafe. This system is designed to apply the brake if the signal is lost from the transmitter and is key to preventing run aways. We really don’t want your brand new favourite thing to start off with a full throttle runaway into a brick wall, or worse, traffic.
To do this, turn the transmitter on and then the buggy. Then, to simulate signal loss, turn the transmitter off and watch the throttle servo. When the fail safe is set correctly the servo will go into the brake position. If it doesn’t, set the fail safe and test again before going out for the first drive.
For how to set the failsafe, check you radio instructions or the description of the accompanying YouTube video.
Now that you’ve confirmed all the electronics are working properly, it’s time to start running in the engine.
First, find somewhere to start the buggy, somewhere outside or open with good ventilation.
Make sure to put some of your 25:1 2-stroke fuel in the tank.
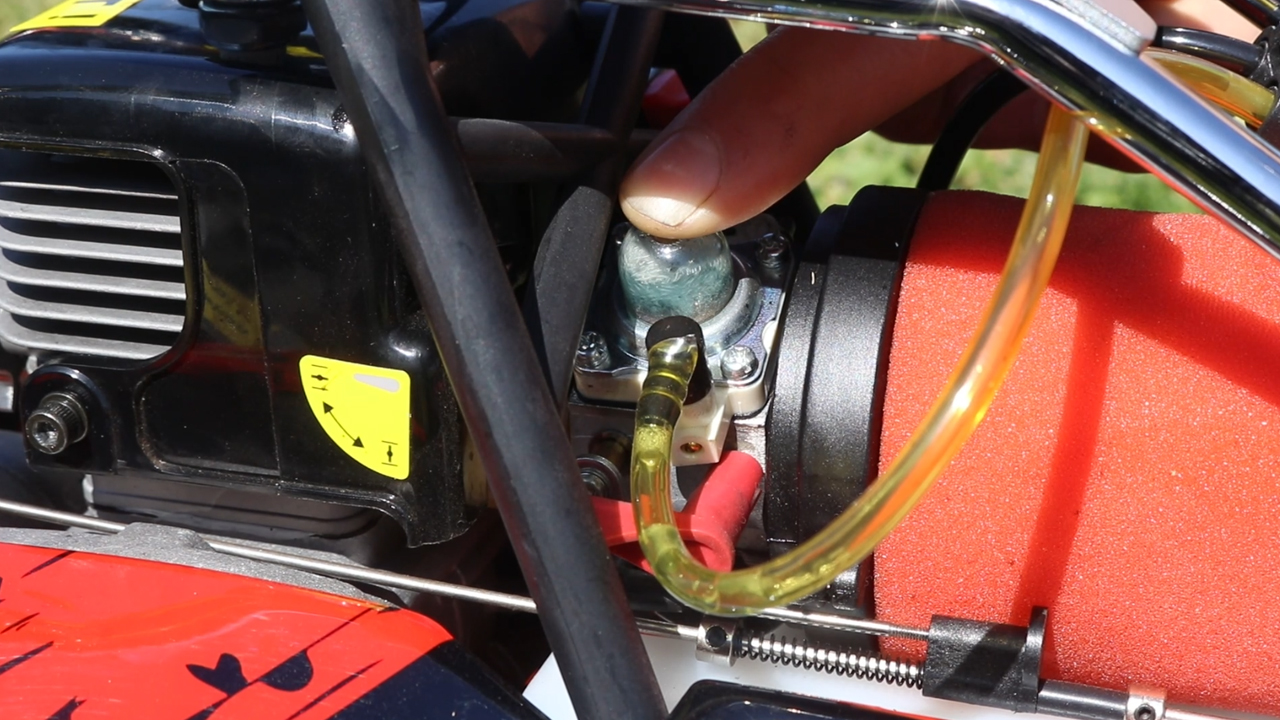
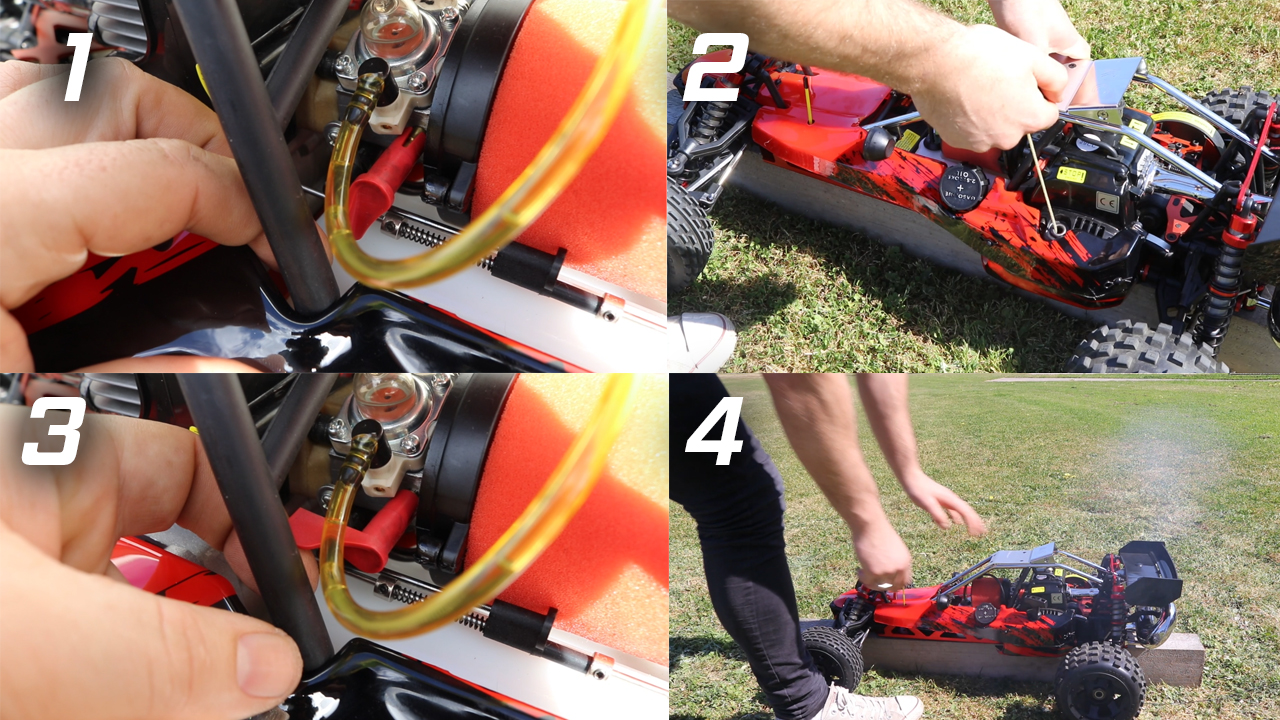
To start the engine, first press the primer bulb a few times until it’s filled, and you can see fuel start to go through the return line back down to the tank. There is no danger of over priming and flooding the engine by using the primer bulb. Flooding is only caused by turning the engine over, using the pull start.
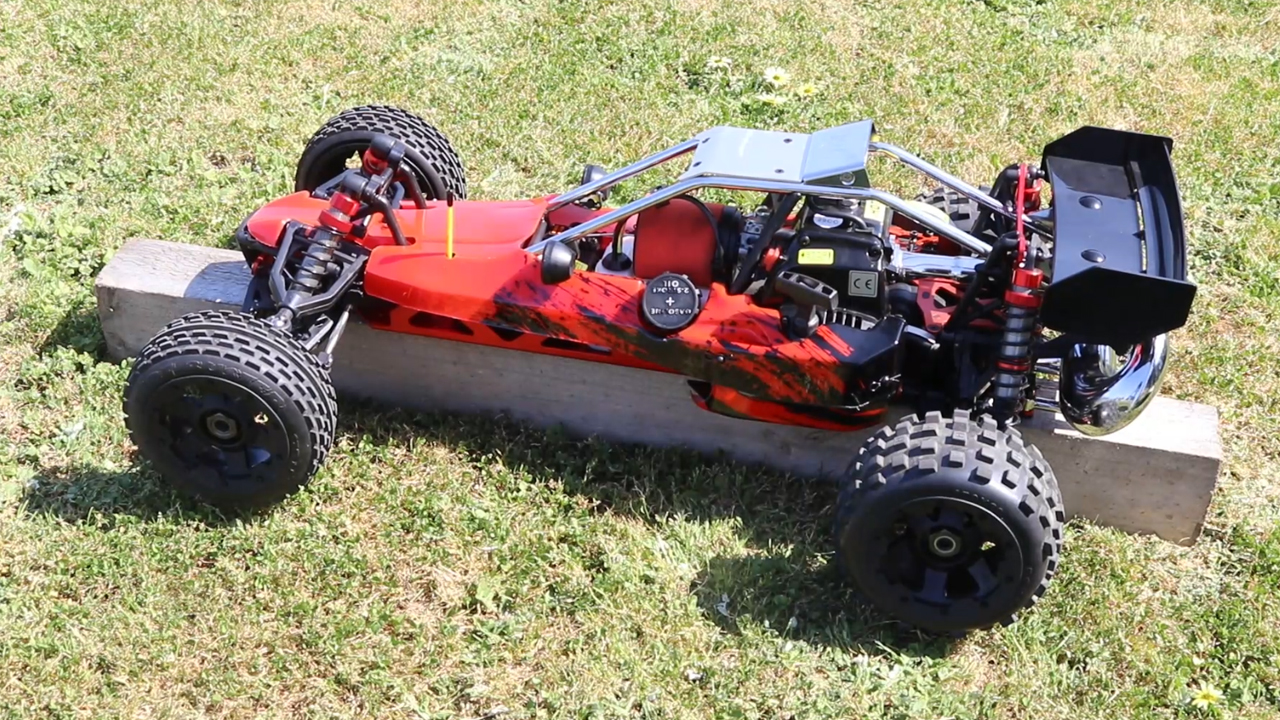
Place the buggy on a large block so the wheels are off the ground.
Turn the choke on by placing the choke lever in the down position and pull no more then 2 -3 times or until you hear the engine fire, whatever is first. Do NOT continue to pull if it doesn’t start - this will result in flooding your engine.
When using the pull starter, use quick short strokes no longer then 50cms, overextending the cord can damage the starter.
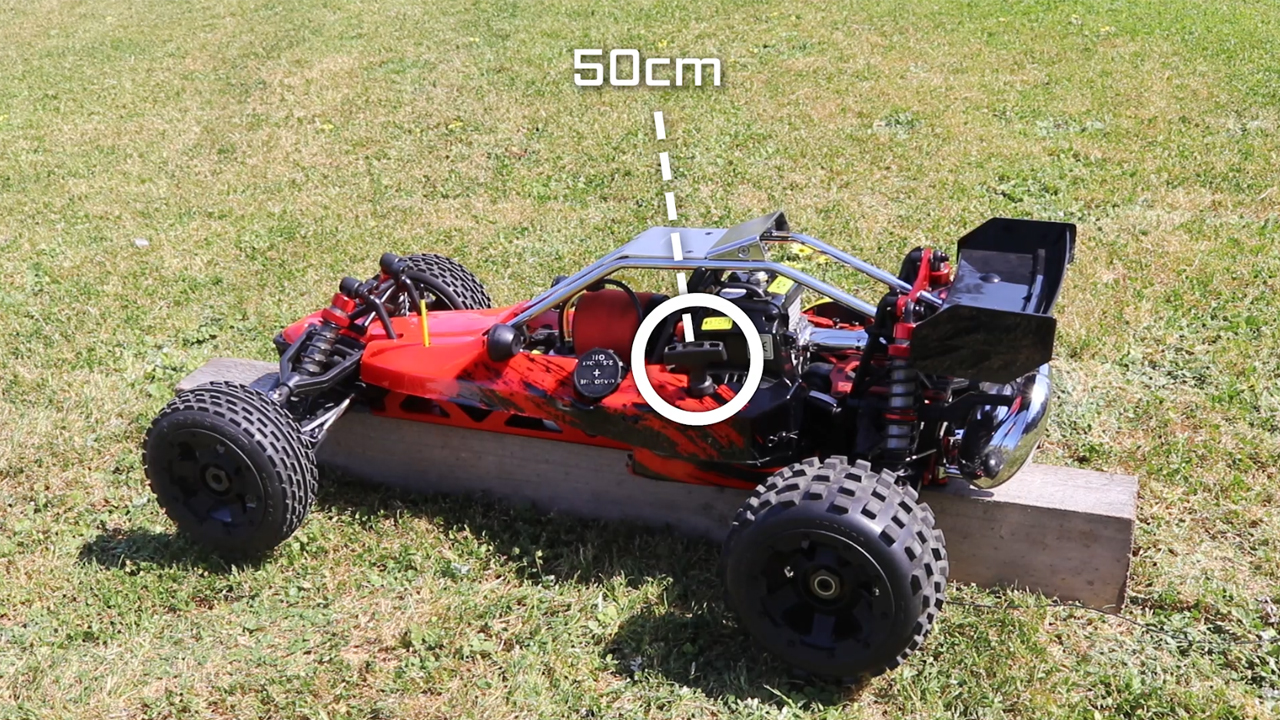
Before each pull, I like to engage the pull start claw before pulling fully. Gently pull until you feel it engage and then pull fully with a quick strong motion.
Turn the choke off by lifting the lever to the horizontal position, then pull the engine 2-3 times or until it starts.
So that’s:
Choke lever down.
Pull 3 times. On the second or third pull, you’ll likely hear the engine fire just a little.
Choke lever up.
Pull 2-3 times, or until the engine starts.
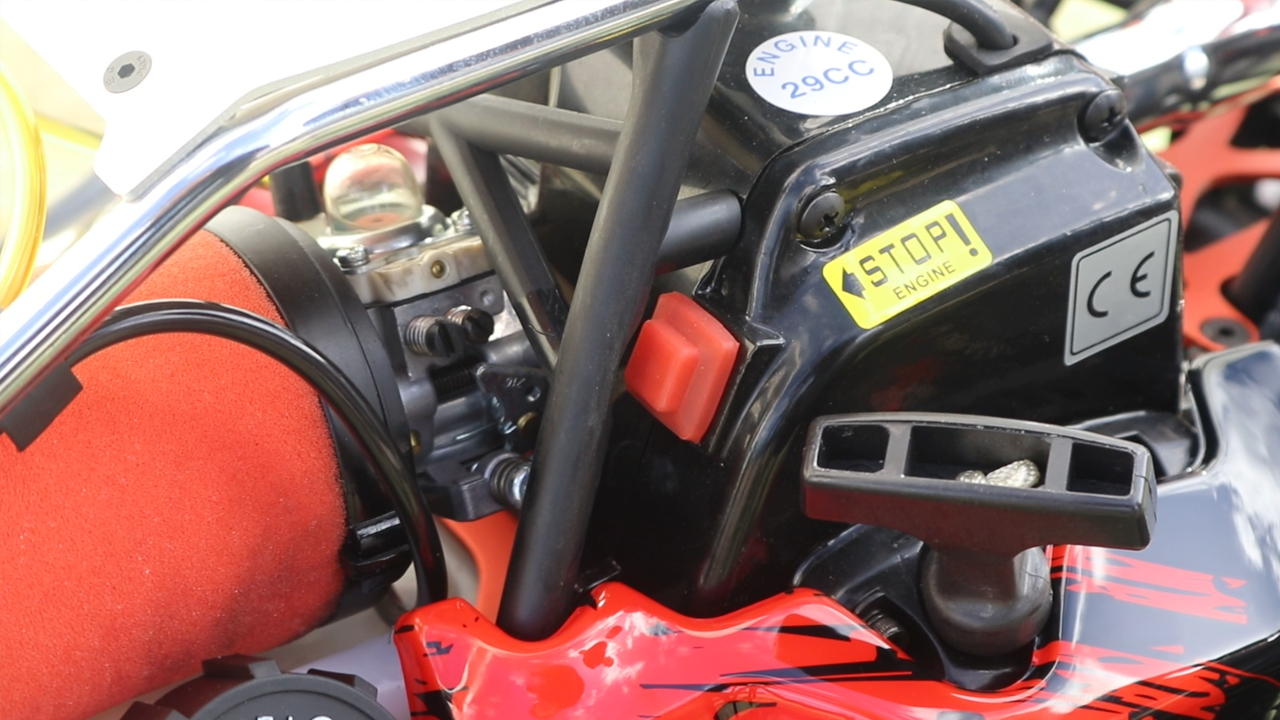
To stop the engine, press the kill switch located to the left above the pull start.
You will not necessarily need to use the choke each time you start your buggy. For example, if you have just refuelled it after running it, do not use the choke as you risk flooding your engine.
If you do flood your engine, you can remove the spark plug and pull the pull start to get the excess fuel out of your engine.
Now that we have tested everything, we can begin the engine break in procedure.
Engine break in is to ensure longevity and performance. There are many ways to break in a two-stroke engine, but the concepts are the same and you should always follow the manufacturers instruction when supplied. The basic concept is to ensure internal components are well lubricated, bedded in with one another and that the engine is used to running at temperature and under load.
First, find a suitable safe, open large space to run the buggy.
Start the buggy and let the engine idle for 15mins, shut the engine off and allow the engine to cool for 30 minutes.
Once cool, start the engine again and allow it to warm up at idle for 1 – 2 minutes before you start gently driving it around for 15 – 20 minutes. Make sure your driving style is smooth with no large sudden throttle changes.
You can take the buggy up to full throttle, but just don’t hold it for very long, 2 – 3 seconds of full throttle will be fine.
Also keep in mind that the Baja’s clutch only kicks in at 8000rpm. That means that the car can rev quite a bit without actually moving – don’t worry, it’s supposed to be like that.
Once you’ve finished driving around for 15 – 20 minutes, turn the engine off and allow it to cool for another 30 minutes.
Repeat this one more time.
You have now completed the engine break in, and are ready to get stuck into it.
Whenever you’re finished running the buggy, turn the car off first, then the controller. Again, the radio should always be the first thing on, and the last thing off.
Be careful not to touch the exhaust as it will be hot after use.
Drain any unused fuel to prevent it going off in the tank.
After each run, inspect for any damaged parts or loose screws and check to make sure the wheel nuts are still tight. I also like to check the exhaust bolts are still tight to prevent an exhaust leak.
Petrol powered RC vehicles produce small vibrations which may loosen hardware over time. Frequently check the bolts, wheel nuts and other screws on your vehicle to ensure that all hardware remains properly tightened.
If you notice a screw is loose, it’s a great idea to remove and apply a small amount of medium strength, blue thread locker before reinstalling.
To ensure engine longevity, it is critical you check the air filter after each run. Clean and reoil if necessary. As a rule of thumb, I clean the air filter after each hour of use when running in dry and dusty terrain.
Clean the buggy off with either a cloth, or compressed air before putting away.
Well, I hope you’ve found this useful and helped you get out there and tear up some dirt!
